Last Updated on January 13, 2019 by XDA Team
There are two versions of the Samsung Galaxy S7 and S7 Edge: the version of Exynos and the Snapdragon. Exynos. Samsung develops it. Qualcomm develops snapdragon. While there are some differences, it is a fact that the Exynos version can be easily rooted … Unlike the Snapdragon. Galaxy S7 also comes with Verizon and Sprint version. In this article, we show Galaxy S7 Root guideline.

Until a few months ago, root in the Snapdragon version was virtually impossible. However, now it is possible. The current method does not allow installing custom ROMs in the Snapdragon version. The root allows overcoming all the limitations of personalization established by the manufacturers. Let’s discover the best tutorial of root the Samsung Galaxy S7 and S7 Edge (Exynos or Snapdragon version).
Galaxy S7 Root guideline
If you have a Samsung Galaxy S7, sure you want to get the most out of it. That and more is what being a root user allows you to do. In short, the root helps overcome all the limitations of customization. From removing unwanted and pre-installed apps, to completely changing the appearance of the system, and much more. In the particular case of S7, root does not allow installing custom ROMs. But no doubt soon it will be possible! Galaxy S7 Root File Download from here.
Although there are benefits, there are also simple risks. Words like “bricked” and “paperweights” are the first to come to mind, but do not despair! If you follow this guide and its advice, nothing bad should happen.
How to Root Galaxy S7 without Computer
The Android device warranty may be voided after applying the Root method that will be presented below. If something goes wrong and you get undesirable effects, the developers will not be responsible. So, treat these instructions at your own risk.
Once you have downloaded the Root tool, follow these simple steps:
1) On your Galaxy S7 or S7 Edge device, activate the option unknown sources or unknown origins, go to Settings> Security and find it here.
2) Once activated the option, install Kingroot APK like any other external application.
3) Once the application is installed correctly on your S7 or S7 Edge, you will be able to see the icon in the applications menu.
4) Execute KingRoot.
5) Click on the Try to Root option shown on the screen to start the root procedure on your Samsung device.
6) In a matter of one to two minutes, the Root procedure will be complete and will show a green signal.
7) Restart your Android device to finish.
How to root Samsung Galaxy S7 with PC
Rooting in the Samsung Galaxy S7 is very simple if you follow all the steps in order. In summary, follow the 3 steps:
- Unlocking the bootloader.
- Installing a custom recovery.
- Installing a superuser app.
Unlock the Bootloader: It lets you access system files and make modifications. Such as flashing ROMs or uninstalling bloatware. The bootloader can be unlocked by Odin. Install a customized recovery program: Customized recoveries allow you to perform a variety of tasks.
Root the device: Install an app that allows access to the superuser. It is what we usually know as root. The most popular is usually SuperSU, but there are many to discover.
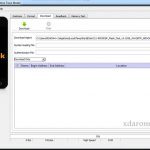
Install SuperSU: With a custom recovery installed, you should only install a superuser app to be root. In our case, we will use SuperSU:
- Download SuperSU to the computer.
- Extract the contents of the * .zip SuperSU file into a folder on the desktop.
- Connect the S7 to the computer via USB cable.
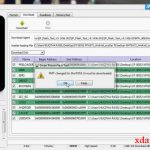
- In the SuperSU folder, double-click on the ” bat ” file. Wait for it to flash the device.
Once installed, disconnect the mobile from the computer and access SuperSU from the apps menu of your smartphone. By carrying out these three steps, your device should be completely rooted and ready to enjoy.
How to Root Galaxy S7 Verizon
You can Galaxy S7 Verizon by using CF Auto Root file and ODIN software. Follow the steps:
- Enable USB debugging from setting menu.
- Extract Odin file and run as administrator.
- Reboot phone into download mode.
- Add CF-Auto-Root file by pressing Ap/Pda button.
- Remove the tick from Re-Partition.
- Press the start button.
It may take 3-5 minutes to complete the procedure.
How to Root Galaxy S7 Sprint
The root process of Galaxy S7 sprint is similar to Verizon version. Follow the procedure as we described in Galaxy S7 Verizon root section. Don’t remove your phone during the rooting process. Unplug the device when you see “Reset” or “Passed” icon on the phone screen.
Considerations
If you decide that the risk is worth it, here are some tips for before you can root in your S7:
Make a backup: You never know what can happen during root. If you have important information, it will be best to back it up.
Disable Antivirus and Firewall: If you use your computer to root, some antivirus settings and firewalls may interfere. To avoid this, deactivate them while performing the root. Do not forget to activate them when finished!
Do not forget to charge your battery: Having your battery die in the middle of the root is not something you want to experience. It is very risky, and you can even damage your S7. So before starting, make sure you have least 80% charge on your phone.
Find an appropriate root method: Not all root tutorials are the same, and not all devices are the same. If you want to be successful, it is best to investigate which method or guide is best suited to you and your Android terminal.
[su_button url=”https://bit.ly/1OADEvW” background=”#68e68a” color=”#120f0f” size=”9″ center=”yes” icon=”icon: download” icon_color=”#ffffff” text_shadow=”0px 0px 0px #000000″]Samsung S7 Root File Download[/su_button]
[su_button url=”https://bit.ly/1WHQeA7″ background=”#68e68a” color=”#120f0f” size=”9″ center=”yes” icon=”icon: download” icon_color=”#ffffff” text_shadow=”0px 0px 0px #000000″]Samsung S7 Edge Root File Download[/su_button]
Final thought,
You have already a root user on your Samsung Galaxy S7 and S7 Edge, both in Verizon and Sprint versions. Galaxy S7 Root is quite easy, as long as you document yourself enough and follow our advice. We hope this tutorial has been useful, and if you have any questions, leave us a comment to help you.
Related posts: